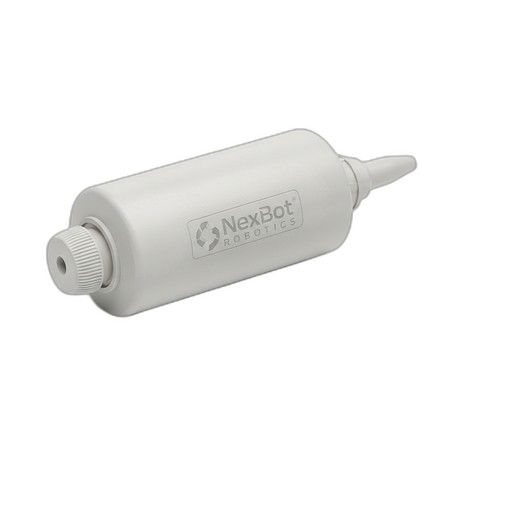
Provides troubleshooting steps for the E-2155 error, which indicates high joint friction often caused by contaminated or degraded NXB-GEN-731-004 joint grease.
Related Products
Tools Required
- Grease gun (compatible with cartridge)
- Torque wrench
- Hex key set / Socket set
- Lint-free cloths
- Personal Protective Equipment (PPE) as required
Article
Overview
The error code E-2155 (Joint Over-Torque / High Friction) is triggered when a robot's controller detects that a joint motor is drawing excessive current to produce movement, indicating abnormal resistance. This issue is frequently linked to the condition of the joint's internal lubrication. This article provides a systematic approach to diagnose and resolve this error by inspecting and replacing the grease using the NexBot Robotics 731-004 Joint Grease Cartridge (NXB-GEN-731-004).
This procedure applies to all joints (J1, J2, J3, J4, J5, J6) on compatible NexBot Robotics platforms, including the R-20, R-50, C-10, and S-5 series.
Symptom
- Primary Symptom: The robot controller displays alarm E-2155, often referencing a specific joint axis. The robot may halt operation.
- Secondary Symptoms:
- Audible grinding, whining, or chattering sounds from the affected joint during operation.
- Sluggish or jerky movement of the corresponding robot arm axis.
- The joint housing feels unusually warm to the touch after operation (use appropriate thermal detection tools; do not touch potentially hot surfaces).
Cause
The most common cause of high joint friction is compromised lubrication. This can result from one or more of the following conditions:
- Grease Degradation: The grease has exceeded its operational lifespan, leading to a breakdown in viscosity and lubricating properties.
- Contamination: Foreign materials such as metal particles, dust, or cutting fluid have mixed with the grease, creating an abrasive paste that increases friction and wear.
- Insufficient Lubricant: The joint does not have an adequate amount of grease due to leaks or incomplete servicing during previous maintenance cycles.
- Incorrect Lubricant: A non-specified grease was used previously, which is incompatible with the robot's internal components or the existing NXB-GEN-731-004 grease, causing it to separate or solidify.
Resolution Steps
Safety First: Before beginning any work, perform a full lockout/tagout (LOTO) procedure on the robot controller and any related power sources according to your facility's safety protocols.
- Identify the Faulty Joint: Note the specific joint axis indicated by the E-2155 error message on the teach pendant or controller interface.
- Position the Robot: If possible, manually move the robot arm to a position that provides safe and easy access to the affected joint's grease fittings and inspection ports. This may require releasing the brakes (follow the robot's specific manual for this procedure).
- Prepare the Grease Cartridge: Load a new NexBot Robotics 731-004 Joint Grease Cartridge into a compatible manual or pneumatic grease gun. Purge a small amount of grease from the gun nozzle to ensure no air is in the line.
- Access Grease Fittings: Locate the grease inlet (zerk fitting) and outlet/purge port on the affected joint housing. You may need to remove a small access panel. Clean the area around both fittings with a lint-free cloth to prevent contaminating the joint.
- Purge Old Grease:
- Remove the plug from the grease outlet port.
- Attach the grease gun to the inlet zerk fitting.
- Slowly pump the new NXB-GEN-731-004 grease into the joint.
- Continue pumping until you see new, clean grease emerging from the outlet port. The purged grease may appear dark, watery, or contain visible metallic particles.
- Note: The volume of grease required varies by joint. Refer to the robot's specific maintenance manual for approximate quantities.
- Clean and Close:
- Once the purge is complete, remove the grease gun.
- Use a lint-free cloth to wipe away all excess grease from the inlet and outlet ports.
- Reinstall the plug in the grease outlet port and tighten it securely.
- Reinstall any access panels that were removed. Tighten bolts to the torque value specified in the robot's maintenance manual.
- Verification:
- Remove all tools from the work area.
- Power on the robot controller and clear the E-2155 alarm.
- In a low-speed manual mode (T1), carefully move the affected joint through its full range of motion several times to distribute the new grease.
- Listen for any abnormal noises. If the joint moves smoothly and quietly, run a pre-existing production program at a reduced speed to confirm the error does not return under load.
Prevention
- Adhere to Maintenance Schedules: Follow the lubrication schedule detailed in your robot's service manual. Regular re-greasing prevents lubricant breakdown.
- Use Genuine Parts: Exclusively use the NexBot Robotics 731-004 Joint Grease Cartridge to ensure chemical compatibility and optimal performance. Using incorrect lubricants is a primary cause of premature failure.
- Inspect for Leaks: During routine operator checks, inspect joint seals for signs of grease leakage. A damaged seal can lead to both lubricant loss and contaminant ingress.
- Maintain a Clean Environment: Keep the area around the robot free of excessive dust, debris, and fluid spillage to reduce the risk of contamination during maintenance.