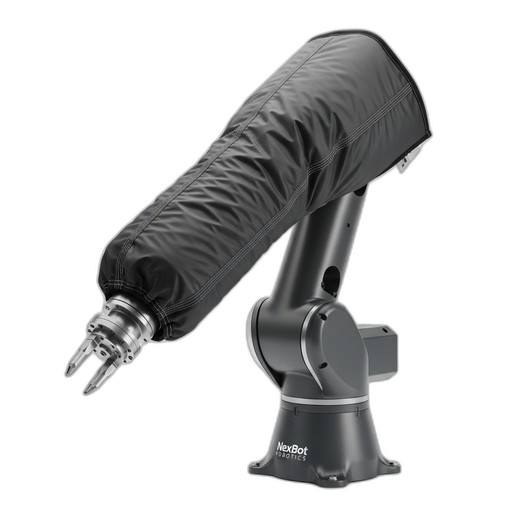
Step-by-step guide for correctly installing the NXB-GEN-821-012 TPU/Kevlar Composite Joint Cover on compatible NexBot R-series and C-series robots to ensure IP65-rated protection.
Related Products
Tools Required
- Torque wrench (Nm)
- 5 mm metric hex key
- Lint-free cloths
- Isopropyl alcohol
- Safety glasses
- Gloves
Article
This article provides detailed instructions for the proper installation of the NexBot Safety 821-012 Joint Cover (SKU: NXB-GEN-821-012) on compatible NexBot articulated and collaborative robots. This cover is designed to protect the J2 and J3 axis joints from contaminants such as dust, fluids, and weld spatter, thereby enhancing robot longevity and reliability in harsh industrial settings.
Following these instructions carefully will ensure the cover is seated correctly to maintain its IP65 rating.
Prerequisites
Before beginning the installation, ensure you have met the following requirements.
Safety Precautions:
- The robot must be completely powered down.
- Follow all site-specific Lockout/Tagout (LOTO) procedures to de-energize the robot and prevent accidental startup.
- Wear appropriate Personal Protective Equipment (PPE), including safety glasses and gloves.
Required Parts and Tools:
- One (1) NexBot Safety 821-012 Joint Cover kit
- Torque wrench with a 5-15 Nm range
- 5 mm metric hex key or socket
- Lint-free cloths
- Isopropyl alcohol (IPA) or a similar non-residue cleaning agent
Robot Preparation:
- Before powering down the robot, move the arm to a position that provides clear and safe access to the target joint (J2 or J3).
- The mounting surfaces on the robot joint housing must be clean, dry, and free of any oil, grease, or debris.
Step-by-Step Instructions
- Confirm Safe State: Verify that the robot is de-energized and that LOTO safety measures are active before approaching the robot.
- Prepare Mounting Surface: Thoroughly clean the exterior surfaces of the robot joint where the cover will be installed. Apply isopropyl alcohol to a lint-free cloth and wipe down the area to remove all contaminants. Allow the surface to air dry completely.
- Position the Cover: The NXB-GEN-821-012 is typically a two-piece clamshell design. Unpack the cover and identify the two halves and the included mounting hardware. Carefully align the first half of the cover over the joint. Ensure that any alignment features, such as notches or pins, are correctly seated against the robot's housing.
- Assemble the Second Half: Place the second half of the cover onto the joint, ensuring it mates cleanly with the first half. The seams between the two pieces should be flush and even around the entire perimeter.
- Install Fasteners: Insert the provided M6 mounting screws into the designated holes. Hand-tighten all screws to ensure they are properly threaded before applying torque. This helps prevent cross-threading.
- Torque Fasteners: Using a calibrated torque wrench with a 5 mm hex bit, tighten the mounting screws in a crisscross or star pattern to ensure even pressure is applied to the cover's internal seal. Tighten each screw to a final torque value of 8 Nm. Do not overtighten, as this can damage the cover or its seal.
- Final Inspection: Visually inspect the entire seam of the installed cover to confirm there are no gaps. Gently attempt to shift the cover by hand to ensure it is securely mounted and does not move.
Verification
After completing the installation, perform the following steps to verify proper function.
- Remove LOTO: Following all safety protocols, remove the LOTO devices and restore power to the robot and its controller.
- Perform Range of Motion Test: In a low-speed manual mode (e.g., T1), carefully jog the robot axis that has the new cover installed. Move the joint through its entire range of motion. Listen for any unusual noises and watch to ensure the cover does not interfere with any cables or other robot components.
- Update Maintenance Records: Document the installation of the NXB-GEN-821-012 cover, including the date and technician, in the robot's official maintenance log. This is critical for tracking asset history and maintenance schedules.